How to run Facebook ads for Shopify
by Mitchell Davies, Shopify Expert
Before you get started, you should have a Shopify store, Facebook page, and Facebook Business Manager account.
Then go to the Shopify app store, and install the “Facebook & Instagram” app.
Open the app, connect your Facebook account, and select your Facebook business page.
If you don’t have a Facebook pixel, ad account, or commerce account set up, just follow the prompts in the app and they will be automatically created.
Once connected, the app screen should look something like this:
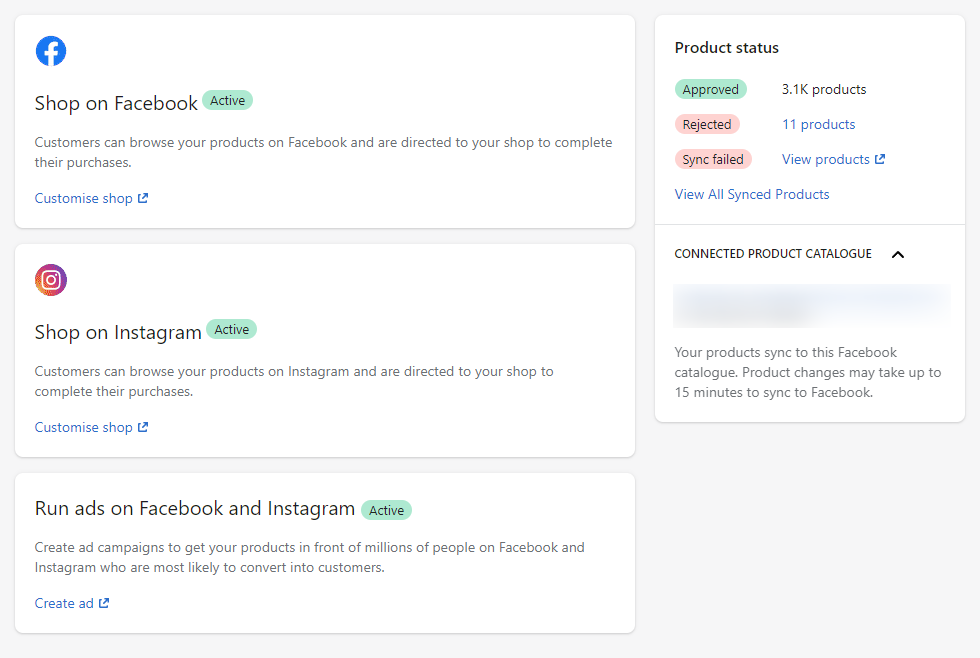
Don’t worry if you don’t see all your products as “Approved” under product status. It can take a couple of hours for them to first sync. If you have any gift cards or digital services they will likely be rejected as well, which you can see by clicking “View products” under product status.
Once your products are approved, you’re ready to run ads on Facebook. You can do this straight from the Shopify admin, but I recommend doing it inside of Facebook directly for more control.
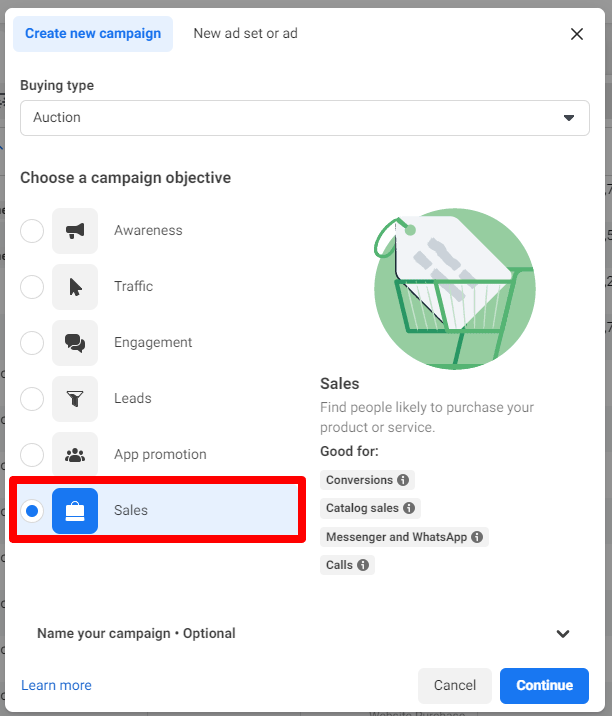
Go to adsmanager.facebook.com, Click create, for your first ad click Sales as the objective
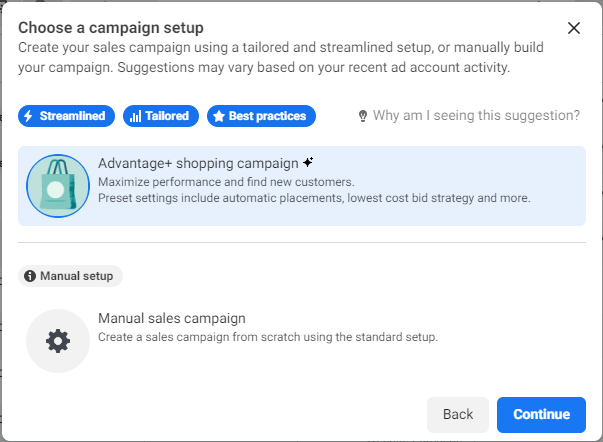
Then select Advantage+, this is a good option when just starting out:
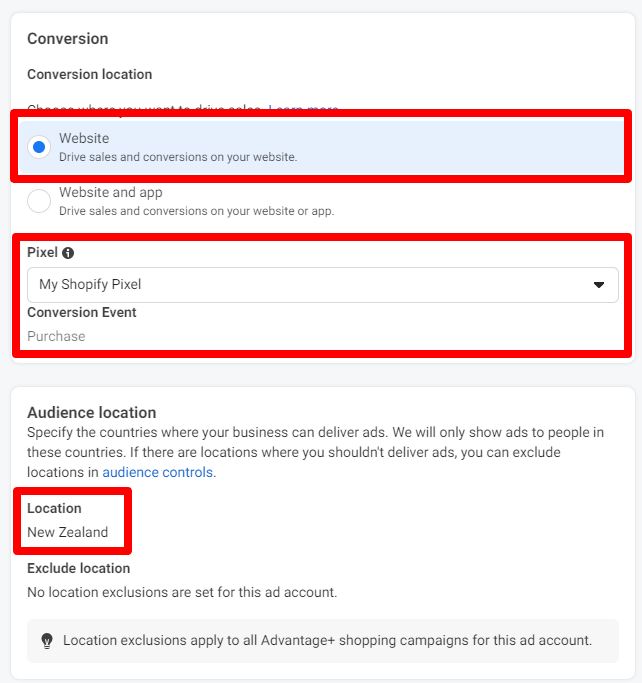
In the next screen, give your ad campaign a unique name, and make sure that “Website” is selected, and your Facebook pixel is selected, and your “Audience location” matches your target market:
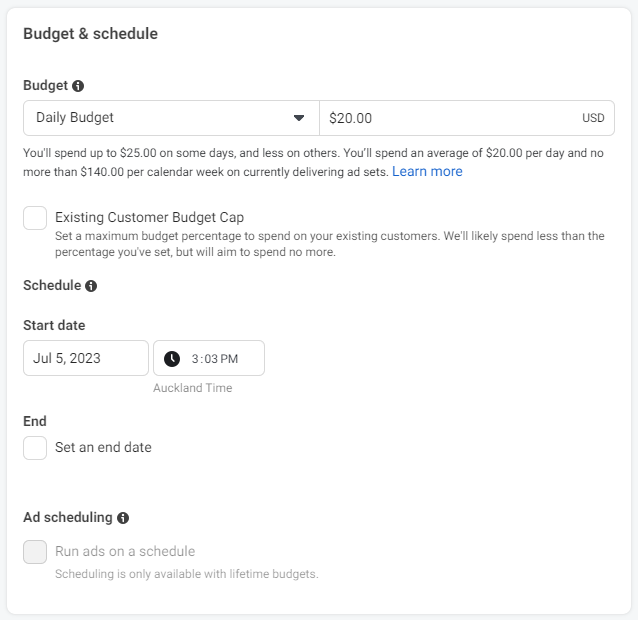
Set a daily budget, if this is your first time advertising I suggest starting small with $25 USD a month or less, and set a start and end date if you need it, then press next.
On the next screen, make sure your Facebook page and Instagram account (if applicable) are selected.
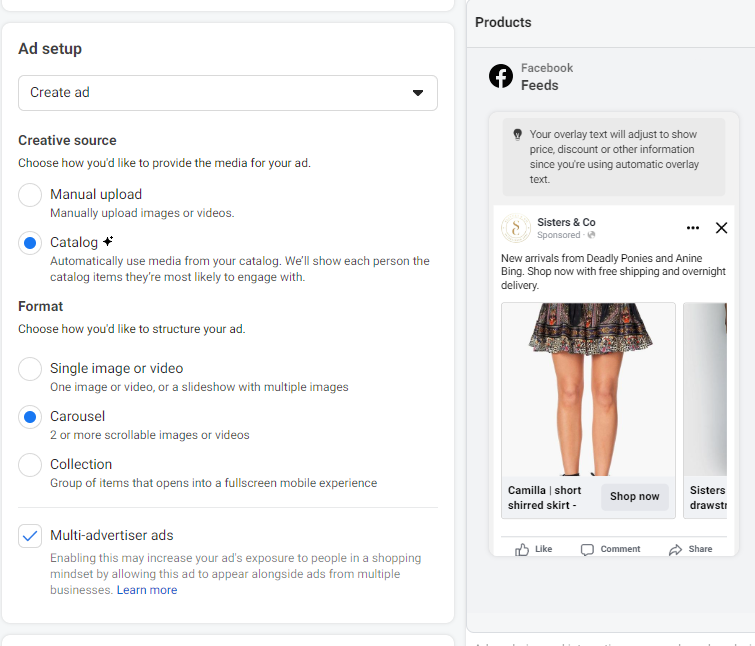
For creative source select “Manual upload” if you want to use your own creatives for media, otherwise select “Catalog” to use your Shopify products. We’ll go with “Catalog” for this guide.
For your first ad, we recommend selecting “Carousel”.
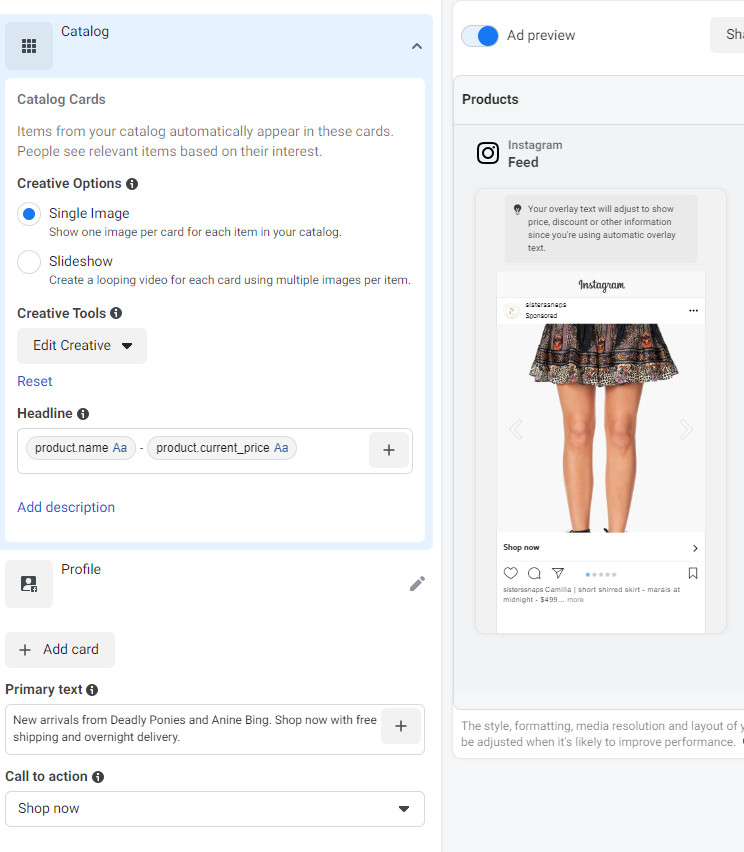
Next, you need to set up a compelling headline, description, and call to action. Every store and audience is different so we suggest experimenting with different creatives and copy, but for example this is a simple way you could format your ad:
What we are doing is:
-
Showing the product name and price on each headline (you can insert those by pressing the plus symbol next to the headline field).
-
For our primary text, this is where you want to communicate what makes your store great. We highlight some of our most popular brands, our free shipping offer, and fast delivery times.
-
For call to action, almost always, that should be “Shop Now”.
-
For the website link, we linked to our homepage.
You can preview how your ad will look on the right.
Under “Tracking” make sure your pixel is selected, and then press “Publish” to finish your ad.
Facebook typically takes about half an hour to review your ad before it starts running, but in some cases it can take a few hours.
And that’s it! You just published your first ad. We kept it pretty simple, but for next steps you should research ad optimisation strategies and experiment with different formats or creatives to improve your Facebook Ad further.
For New Zealand Shopify merchants interested in getting more out of their Facebook ads, we offer Shopify ad consulting and management services, learn more about it here.